

KORG NANOPAD 2 TUTORIAL: FROM SAMPLING TO PLAYING
I will try to explain each step in more detail about what is going on in below video demonstration tutorial. YouTube shutdown on-screen annotations (textual guides) because of abuse and incompatibility with mobile devices, which resulted in a video that is harder to follow and understand. Each step is explained in more details below.
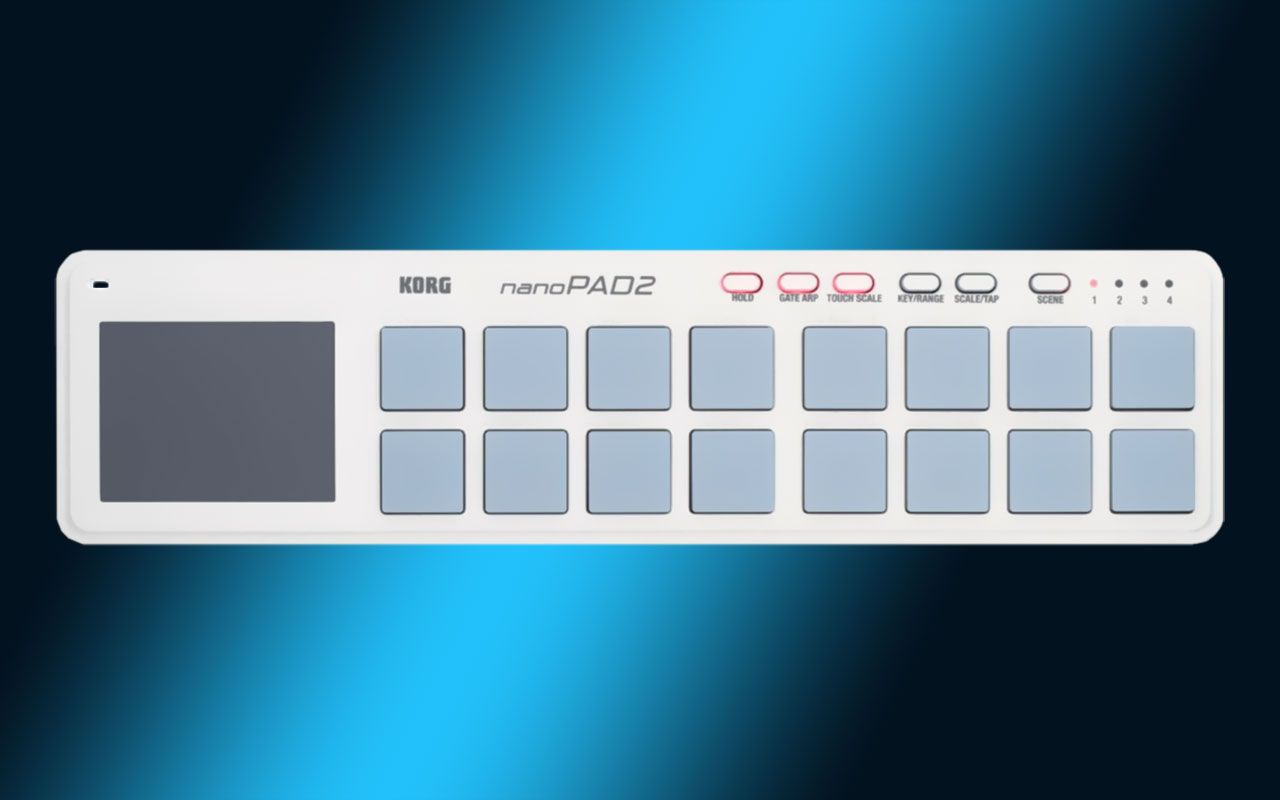
KORG NanoPad 2
KORG nanoPAD 2 common usage demonstration throughout all creative stages:
STAGE 1: Audio Sampling
“AUDIO SAMPLING” is a fancy word for recording audio (sound) with portable recorder or any device (mobile phone, tablet, laptop, desktop PC + dedicated MICs etc.) capable of recording sound in your environment. Alternatively, you can use pre-recorded / pre-made samples from free or commercial sound libraries or a synthesizer as a sound source. One place to start with free sounds is freesound.org but there are many, many more…
STAGE 2: Sound Editing
We must edit individual samples (“sounds” or sound files) from our continuous audio recordings (cut/trim silence + fade-in/fade-out + normalization) with sample (audio) editor such as Audacity, Wavosaur, SoundForge, or many DAWs which come with built-in (integrated) audio editing capability today.
STAGE 3: Sample Mapping
3.1 We must load and map our individual samples (sound files) in our software synth (TRG drum module in NanoStudio, for example).
3.2 We must, also, tell our nanoPAD midi controller which notes to trigger that will correspond to desired TRG pad (note), respectively. For example, when you strike the first pad on the left bottom side, it will or should trigger note C4 or A#4 or Db5 inside TRG software module – you get the idea! For that part, we must use KORG Kontrol Editor software.
STAGE 4: Finally playing :)
One important thing (not shown in video tutorial for simplicity) is that inside your DAW software you must “listen” on the same MIDI channel as nanoPAD sends/transmits the triggered pads (notes). Usually there is a setting in your piano instrument or global DAW option like 1,2,3…16, “any” or “omni” MIDI channel option (last ones are fool-proof options that make your DAW instrument listen on all channels simultaneously). This is also one of the reasons why we need Korg Kontrol Editor — in order to map keyboard layout for piano or drum pads or any other instrument. You can use our nanoPAD2 presets (scroll below to download section) for your convenience if you wish to use nanoPad2 like a piano keyboard.
AUDIO GEAR
1. KORG nanoPAD 2 controller
16-pads MIDI controller from KORG is both cheap and useful gadget, but unfortunately, a bit on a far side from professional equipment.
2. CONRAD McCrypt DR3 portable recorder
(24bit/48kHz XY stereo configuration)
This funny little gadget is a portable Digital Audio Recorder with 2 high-quality microphones in ~90 degrees position. It records sounds on internal SD memory card. Very handy!
3. SoundForge 8
I use SoundForge audio editor for professional trimming / cutting individual sound samples from a continuous recording (.WAV stream) file(s).
Also, you can use 100% free alternatives such as Audacity or Wavosaur.
4. BlipInteractive NanoStudio (Windows version 1.42)
Very simple & beginner friendly cross-platform DAW (mobile + desktop Digital Audio Workstation).
5. KORG Kontrol Editor software
As every DAW is different, we must adapt which notes are triggered by NanoPad, when we hit (trigger) them with our palms and fingers. With KORG Kontrol Editor software you can map each notes, velocities and MIDI CC messages that will correspond to (in our case) NanoStudio’s TRG Sampler player module. Keep in mind that if you use FL Studio FPC drum module, or any other DAW or VSTi plugin, the mapping will be different. You should either consult corresponding documentation that comes with the hardware/software, or experiment with different notes to found out proper mapping by yourself.
6. And introducing my kitchen’s water sink! :-)
We can record any original sound we like PLUS not trigger any copyright claims :)
NEW VIDEO (2020)
ORIGINAL TUTORIAL (FROM 2013)
NOTE: This video uses YouTube Annotations (on-screen commentary). Please watch it on your laptop or desktop computer instead of mobile YouTube app or mobile browser apps! (annotations aren’t shown / working there!)
update: Annotations are forever gone since YouTube cancelled them in 2019. A lot of valuable on-screen information is forever lost. I am tight with spare time now and cannot re-do entire video with voice-over and extra material. Maybe one day…
(please read comments @ youtube)
DOWNLOADS
Below are couple of presets which can be used with TRG module in NanoStudio (used in our video tutorial), or ordinary piano keyboard (to play simple melodies, chords etc. on chromatic instruments).
In order to map nanoPAD2 with a traditional keyboard layout for piano or keyboard-type chromatic synth instrument, you can try our scales presets for your convenience; with A-minor and C-major scales mappings you will get 2 rows for upper and lower octaves, respectively.
Why? Because, factory layout in NanoPad2 is not suitable for any piano scale and live playing/performance (notes on pads are inconveniently ordered by default, with white and black keys constantly changing upper and lower row positions).
Of course, we do not recommend nanoPAD2 for any serious keyboard performance, it is absolutely NOT a replacement for a true piano keyboard, but it may be fun for quick mockups, simple melodies and chords.
KORG nanoPAD2 Scene Presets (Major/Minor Scales & NanoStudio TRG)
What are KORG nanoPAD2 Scenes?
Answer:
KORG “scenes” are individual presets containing all note midi mappings for each individual pad that you can load into your nanoPAD2 via KORG Kontrol Editor Software to any Scene bank you wish (1,2,3 or 4).
Quick Instructions:
- Connect nanoPAD2 to PC via USB
- Run KORG Kontrol Editor software
- Select Scene you wish to write to
- Open File > Load Scene Data File… (load it from your location of scenes where you extracted below .zip archive)
- Go to Communication > Write Scene Data
- DONE!
KORG nanoPAD2 Sets Presets (Major/Minor Scales & NanoStudio TRG Combo)
What are KORG nanoPAD2 Sets?
Answer:
Sets are combinations of 4 scenes, very useful for quick loading all 4 scene presets at once.
Quick Instructions:
- Connect nanoPAD2 to PC via USB
- Run KORG Kontrol Editor software
- Open File > Open (load a .nanpad2_set file from your location of sets where you extracted .zip archive)
- Go to Communication > Write Scene Set
- DONE!


![Xiaomi App - How To Re-Install Stock Factory Version - How To Fix Corrupted Gallery App [no root]](https://tehnoblog.org/wp-content/uploads/2025/09/Xiaomi-Gallery-App-Code-Bugs-Artwork-1024x576.png)


Comments
Post A Comment